Palworld 1.0 Best Resource Base Locations: Map & Coordinates

- For resources specifically, the standouts are: Ore Galore (156,-396) and the Guardian ore+coal peak (180,-39) for mining; Mt. Obsidian (-744,-442) for sulfur; the Astral Mountains (-212,250) for ~9 Pure Quartz; Sakurajima (-646,270) for oil; and Sunreach (-302,-1426) for Soralite, its only source.
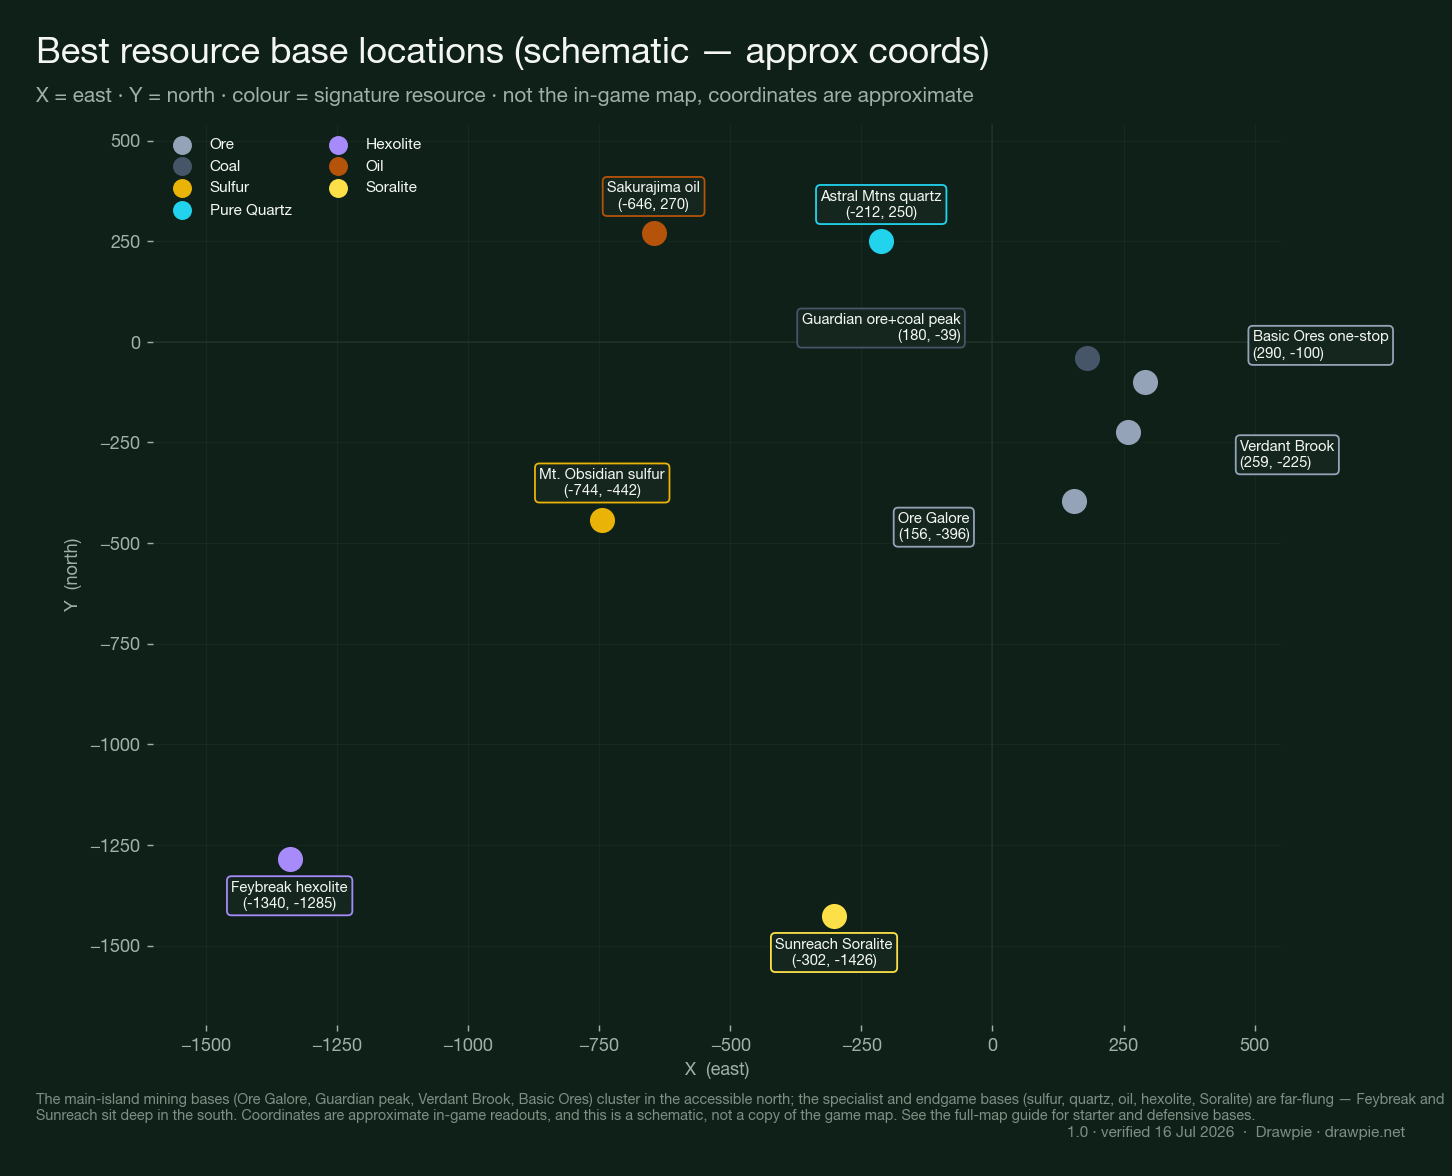
- The main-island mining bases cluster in the accessible north; every specialist (sulfur, quartz, oil, hexolite, Soralite) is far-flung, and several need heat or cold gear. Rich and easy-to-build almost never overlap.
- The efficient resource split is three bases: one comfortable ore+coal hub (Guardian peak) as your main, plus a Pure Quartz base and an oil base — that covers the core production chain, with a sulfur or Soralite outpost swapped in as needed.
- Node counts are only firmly documented in two spots (Astral ~9 Pure Quartz, Obsidian ~7 sulfur); everything else is a community estimate, and all base coordinates are approximate in-game readouts.
Need a base that actually feeds your crafting? This is the resource-focused cut of our base guide: which spot has which material, with coordinates, a base-by-resource matrix, and the efficient three-base split. (For the full picture — safest starter, defensive bases, beginner mistakes — see the main best base locations guide ; this one is all about resources.)
The best resource base locations
Here are the bases worth building for what they mine, plotted by their approximate coordinates (X = east, Y = north) and coloured by their signature resource:
| Base | Coordinates | Best for | Stage |
|---|---|---|---|
| Ore Galore | 156, -396 | Ore (game8 counts 7 nodes) | Early |
| Verdant Brook | 259, -225 | Ore (~8, community est.) | Early |
| Guardian ore+coal peak | 180, -39 | Ore + Coal in one radius | Mid |
| Basic Ores one-stop | 290, -100 | Ore + a little sulfur & quartz | Mid |
| Mt. Obsidian sulfur | -744, -442 | Sulfur (~7 nodes) — heat gear | Mid |
| Astral Mtns quartz | -212, 250 | Pure Quartz (~9 nodes) — cold gear | Mid |
| Sakurajima oil | -646, 270 | Crude Oil (Polymer) | Late |
| Feybreak hexolite | -1340, -1285 | Hexolite + Oil | Endgame |
| Sunreach Soralite | -302, -1426 | Soralite (its only source) | Endgame |
The shape of the map tells the story: the ore and coal bases sit in the comfortable north, while every specialist resource — sulfur, quartz, oil, hexolite, Soralite — is out on the edges, and the two endgame spots are all the way down south.
Base × resource supply matrix
Want to see exactly what each base gives you? This matrix rates every base’s supply of each gatherable resource from 0 (none) to 3 (rich/signature):
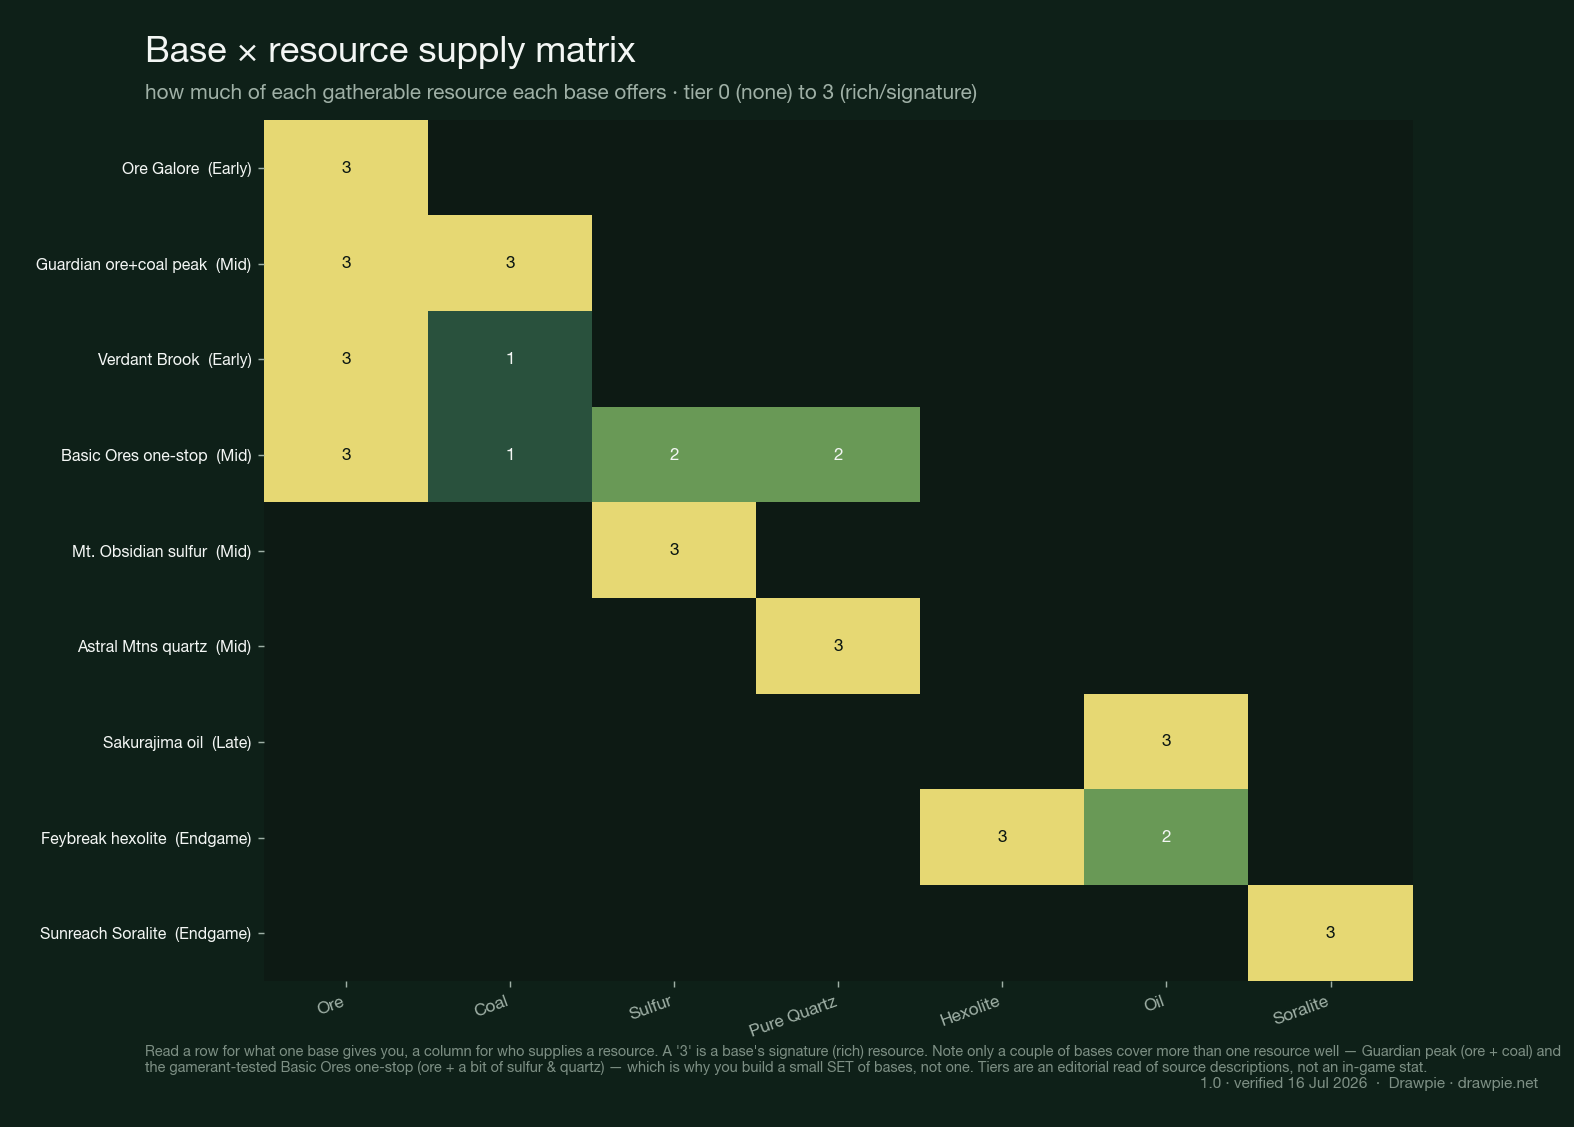
The takeaway: almost every base is a one-resource specialist. Only two bases spread their supply — the Guardian ore+coal peak (ore and coal) and the gamerant-tested Basic Ores one-stop (ore plus a bit of sulfur and quartz). That’s exactly why you don’t chase one perfect base — you build a small set.
Rich vs. easy: the trade-off
Plot each base by how resource-rich it is against how convenient it is to build (flat ground + fast-travel access), and the tension is obvious:
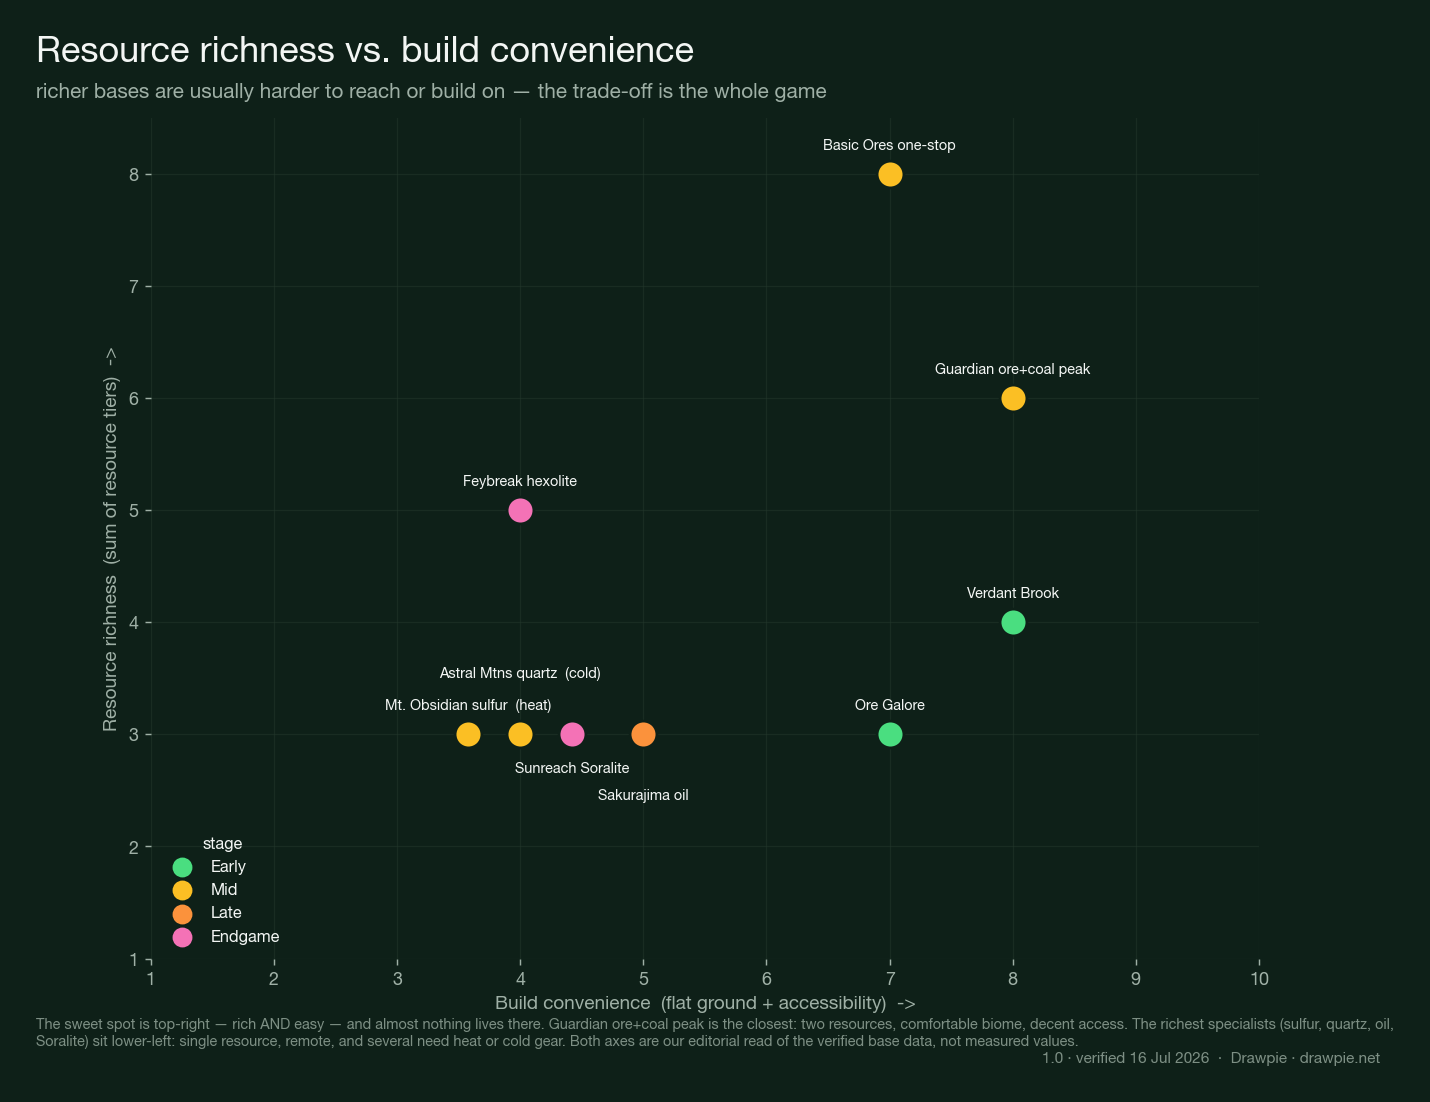
The top-right — rich and easy — is nearly empty. The closest thing is the Guardian ore+coal peak: two resources, a comfortable biome, and decent access. The richest specialists all sit lower-left: single-resource, remote, and several demand heat or cold gear before you can even work there.
The best 3-base resource setup
Palworld lets you run three bases early, so don’t make them all miners. The efficient resource split is one comfortable hub plus two specialists:
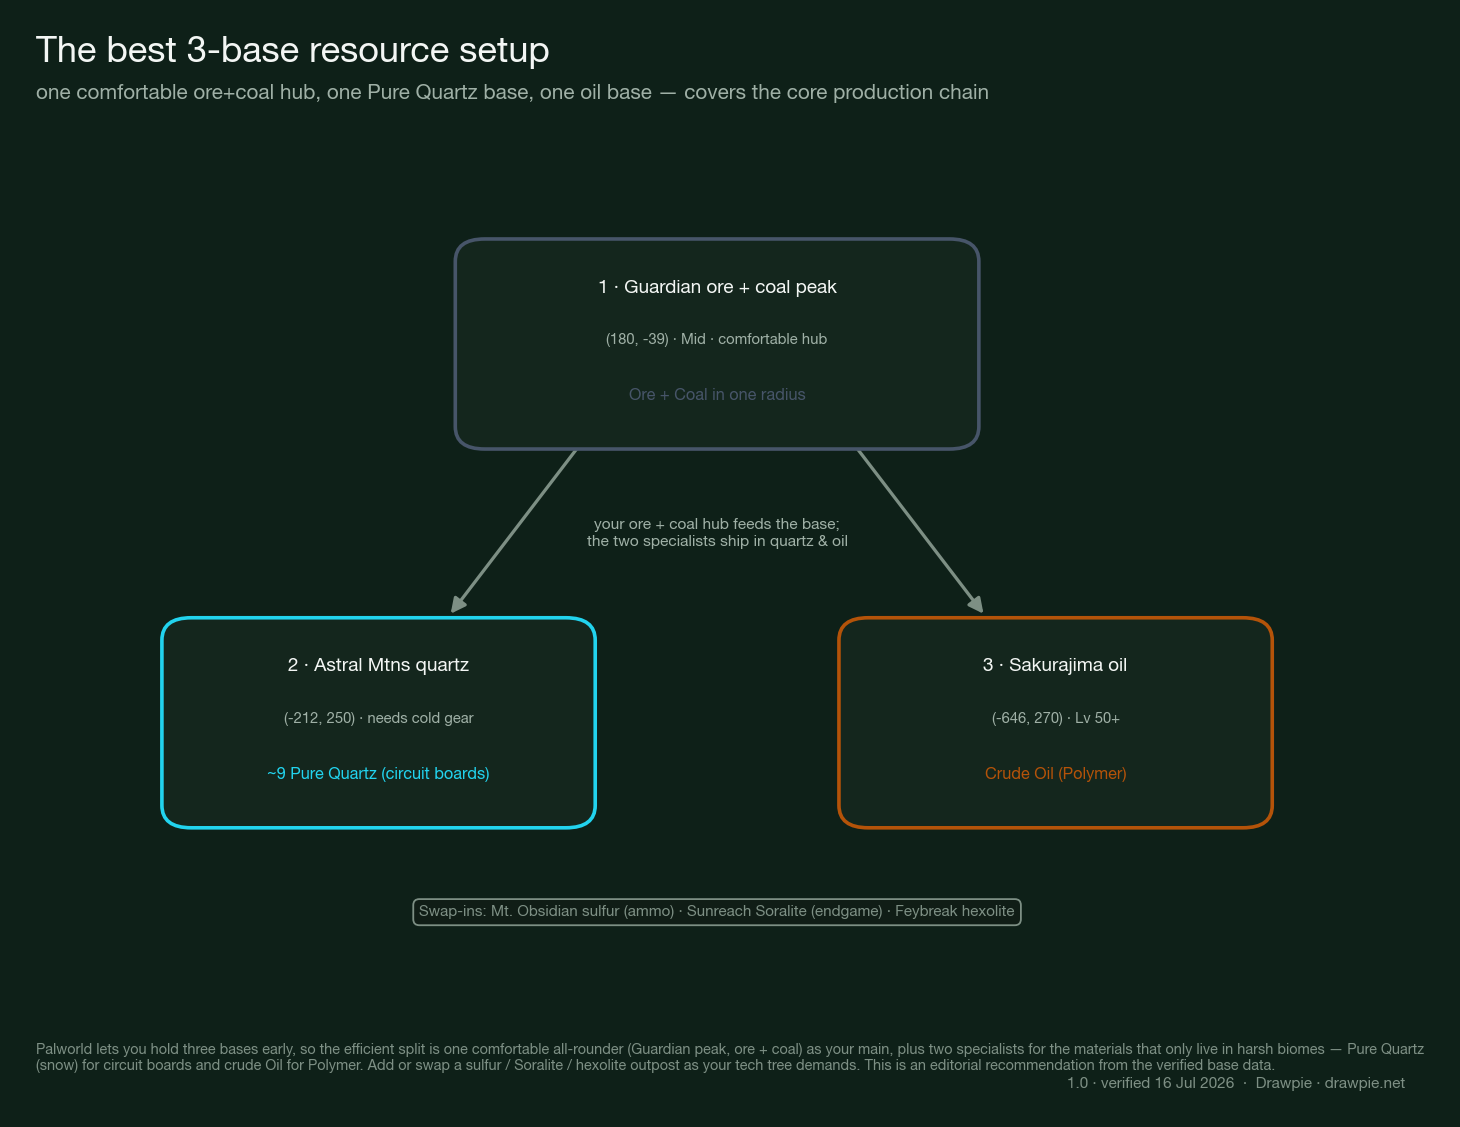
- Guardian ore + coal peak (180, -39) — your comfortable main hub; ore and coal in one radius covers the backbone of crafting.
- Astral Mountains quartz (-212, 250) — ~9 Pure Quartz for circuit boards (bring cold gear).
- Sakurajima oil (-646, 270) — crude oil for Polymer, the other big production bottleneck.
Then swap in a sulfur outpost (Mt. Obsidian, for gunpowder and ammo), a Soralite base (Sunreach, endgame) or hexolite (Feybreak) as your tech tree demands.
Score any base for your own priorities
Which of these matters most depends on your run. Our Base Location Finder scores all 11 best bases against the priorities you set (mining, flat ground, comfort, access…), filters by the resource you need, and sorts by distance from your current coordinates — so it doubles as a base score calculator.
Frequently asked questions
What’s the best base for ore in Palworld 1.0?
For pure ore, Ore Galore (156, -396) — game8 counts 7 nodes — or Verdant Brook (259, -225). But the best mining main base is the Guardian ore+coal peak (180, -39), because it has ore and coal in one radius and a comfortable biome.
Where do you get Pure Quartz and Oil?
Pure Quartz is richest in the Astral Mountains (-212, 250) — around 9 nodes, in snow, so bring cold gear. Crude Oil (for Polymer) is at Sakurajima (-646, 270), a Level 50+ outpost.
Where is Soralite?
Only at Sunreach (-302, -1426), the sky-island endgame area reached via the Feybreak Tower — it’s the sole source, and you harvest it with the Plasma Multicutter.
Do I need a separate base for every resource?
No — three is plenty. Run one comfortable ore+coal hub as your main, plus a quartz base and an oil base, and swap in a sulfur or Soralite outpost when your tech tree needs it.
The bottom line
For resources, think in sets, not perfect single bases: a Guardian ore+coal peak hub for the crafting backbone, an Astral Mountains quartz base and a Sakurajima oil base for the production materials, and specialist outposts (sulfur, Soralite, hexolite) added as you climb the tech tree. Note the coordinates are approximate and most node counts are community estimates — so score the bases against your own priorities before you commit.
More Palworld 1.0: the full best base locations guide (starter and defensive bases too), the Pure Quartz farming guide , and the map guide .